

As recently announced, we are shutting down Imagine at the start of May, and we want to make sure every user has a clear path to keep their projects running.
Since every Imagine project is already powered by Appwrite Cloud under the hood, your databases, users, and files can be migrated directly into your own Appwrite Cloud project using the built-in migration tool. This guide walks you through the process.
Before you begin
Each Imagine project is equivalent to one Appwrite project. You should create a separate Appwrite Cloud project for each Imagine project you want to migrate. Migrating multiple Imagine projects into a single Appwrite project can cause conflicts with databases, tables, and storage buckets, since all Imagine projects use the same resource IDs.
Make sure you have:
- Access to your Imagine project in the Imagine Studio
- An Appwrite Cloud account (you can sign up for free)
Get your Imagine project credentials
Open your project in the Imagine Studio and navigate to Settings. On the Overview tab, you'll find your project's API credentials, including the Project ID and API Endpoint.
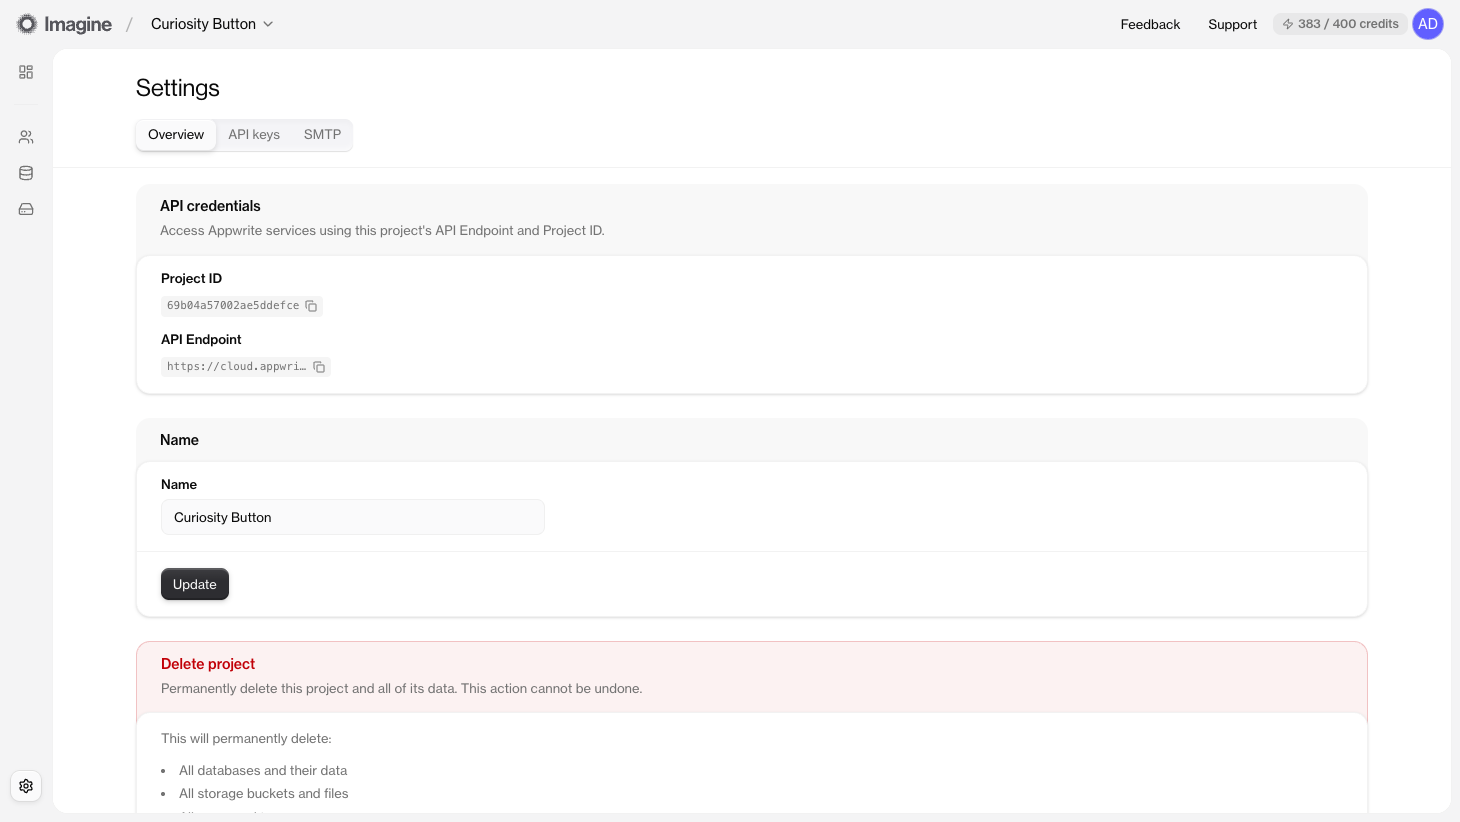
Copy both values somewhere safe. You'll need them when setting up the migration.
Create an API key
Switch to the API keys tab and click on Create API key. Give the key a name and ensure all scopes are selected since the migration tool needs full read access to transfer all your project data.
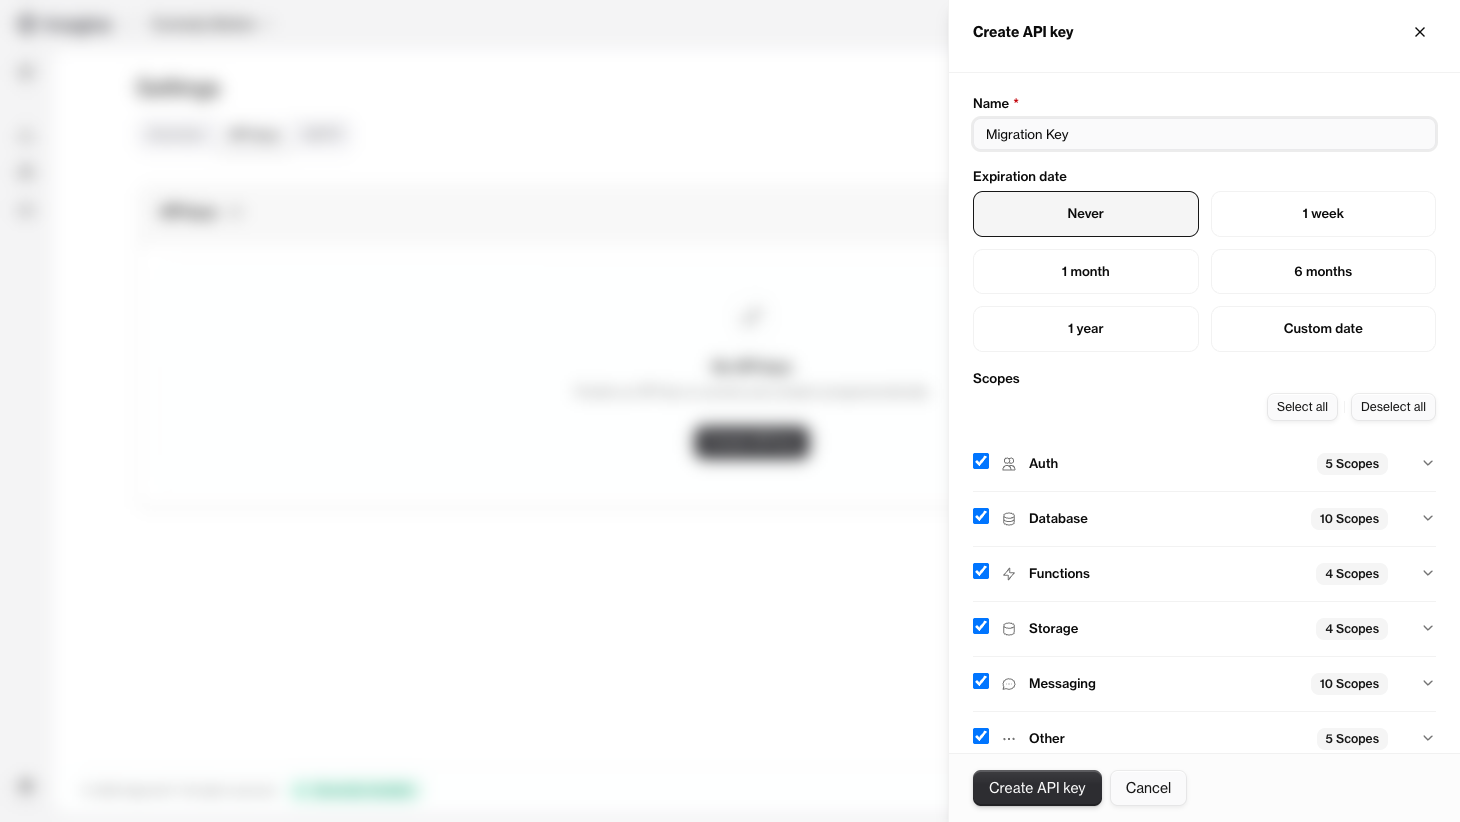
After creating the key, copy the key value immediately. You won't be able to view it again.
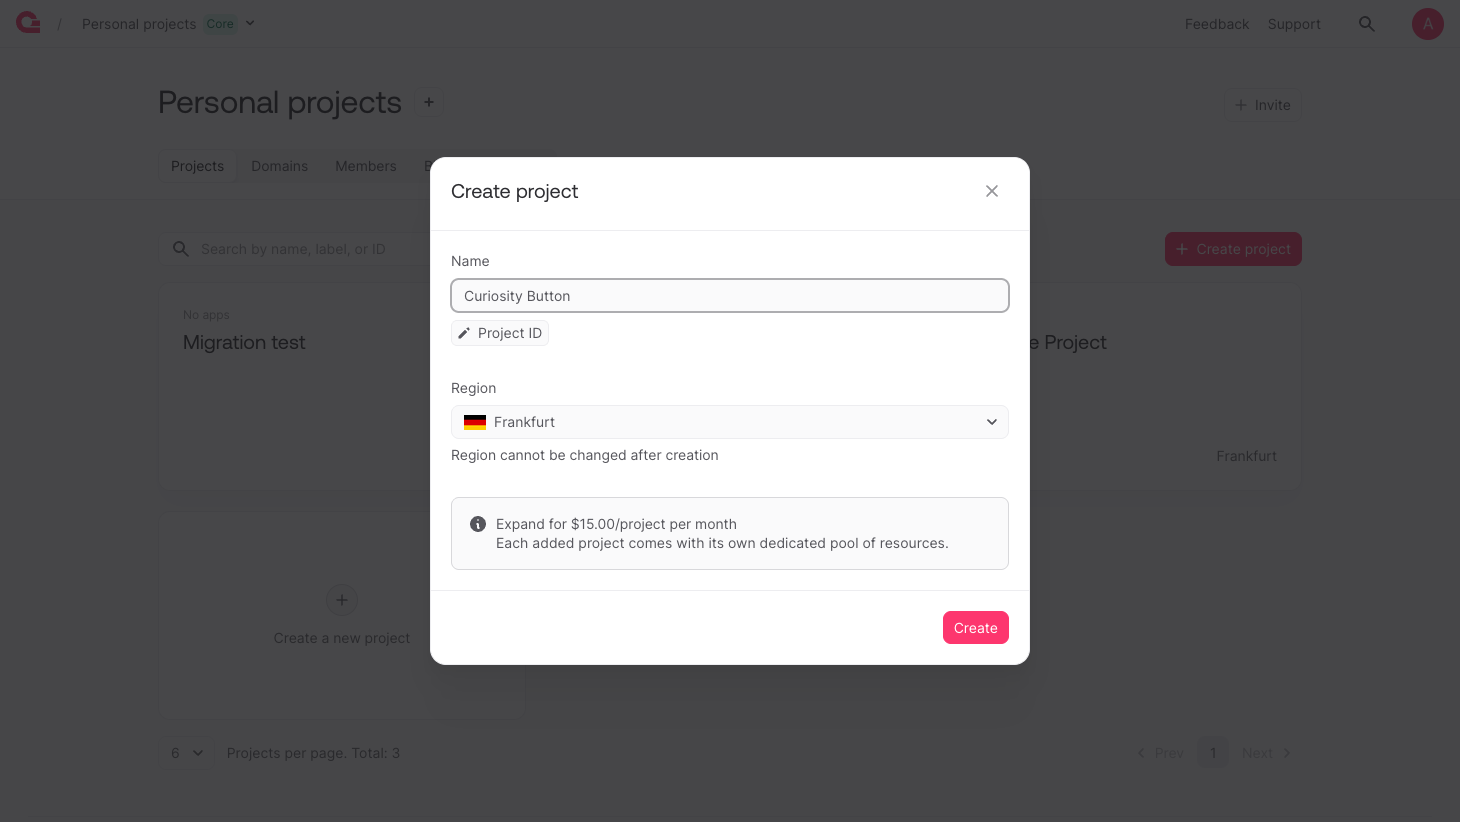
Create a new project in Appwrite Cloud
Head over to the Appwrite Console and create a new project. Give it a name and select your preferred region.
Start the migration
Once your project is created, head to the Settings page, and click the Migrations tab.
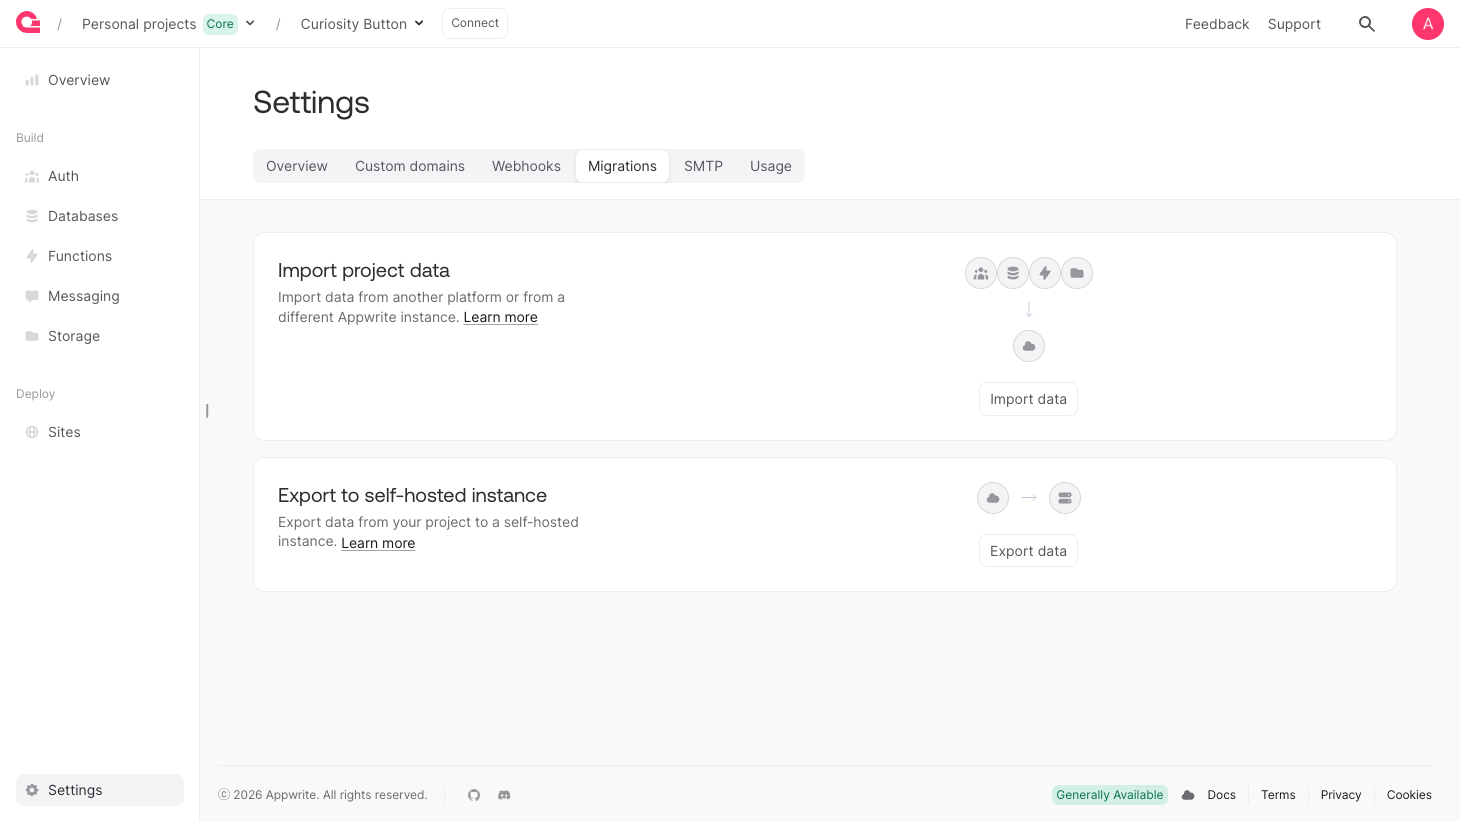
Click on Import data to configure the migration process before it begins. In the migration wizard, select Appwrite self-hosted as the source platform.
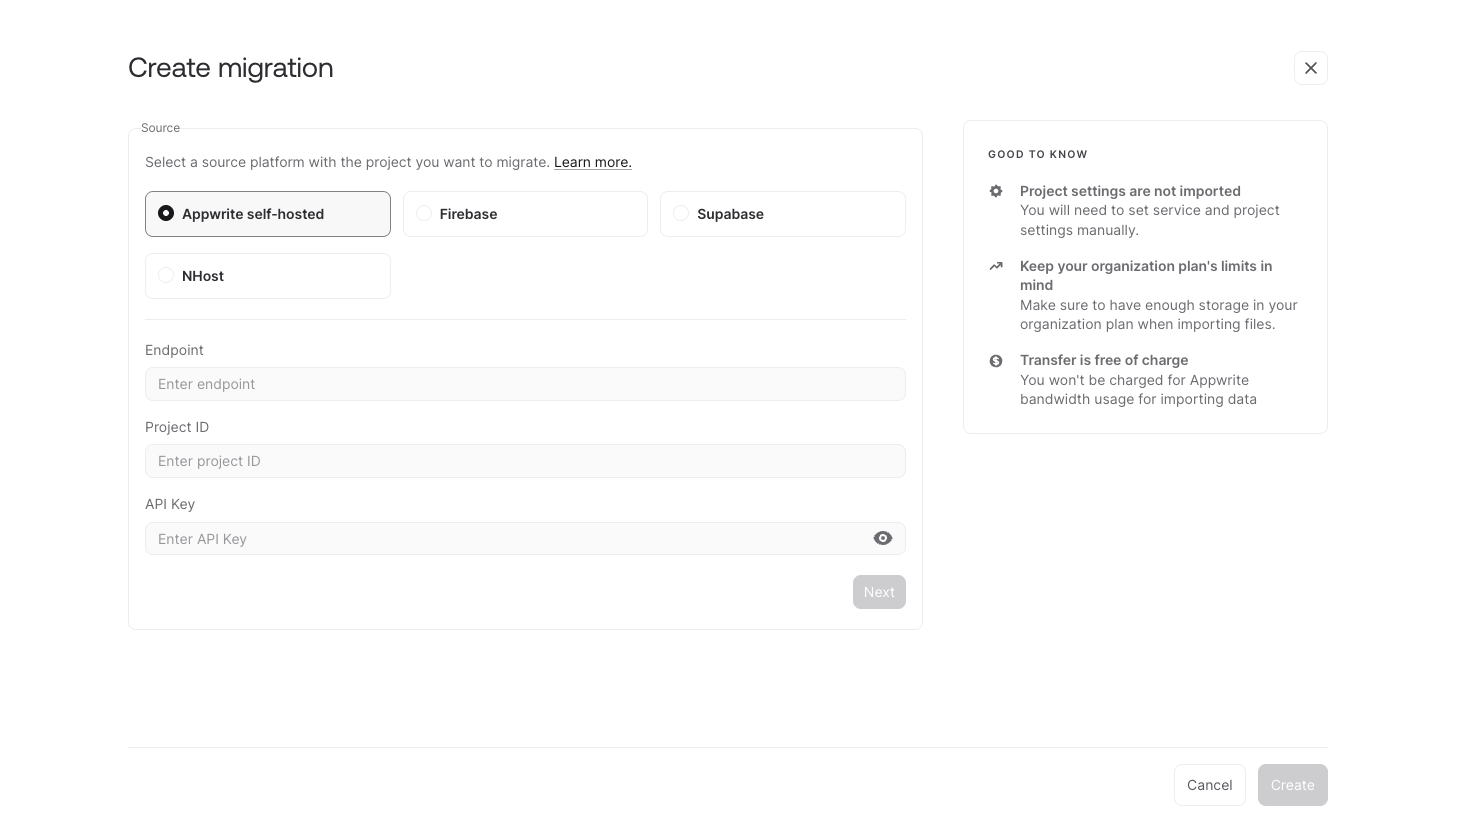
Fill in the fields with the credentials from your Imagine project:
- Endpoint: The API Endpoint from your Imagine project settings (e.g.,
https://cloud.appwrite.io/v1) - Project ID: The Project ID from your Imagine project settings
- API Key: The API key you created earlier for your Imagine project

Click on Next to proceed. The migration tool will connect to your Imagine project and let you select which resources to transfer.
What gets migrated
The migration tool transfers the following resources:
- Accounts: All user accounts and their authentication data
- Databases: All databases, tables, rows, and other preselected settings (such as permissions)
- Files: All storage buckets and files
- Sites: All Appwrite Sites
Note: Project settings are not included in the migration. You'll need to configure those manually in your new Appwrite Cloud project. Data transferred by migrations will also reset $createdAt and $updatedAt timestamps to the date of the migration.
If you have configured a custom domain or a appwrite.network domain, you must manually remove the domain from your Imagine project first before adding it to Appwrite Cloud. This step is kept is kept manual to ensure you don't experience any unforseen downtime in your apps during the migration process. After May 1st, all domains assigned to Imagine projects will be released and made available for use on Appwrite Cloud.
After the migration
Once the migration completes, verify your data in the Appwrite Console. Then update your application's endpoint and project ID to point to the new project.
With your project now on Appwrite Cloud, you get full access to custom domains, webhooks, SMTP, functions, environment variables, team collaboration, and more.
Need help?
Our team is here to support you through this transition. If you run into any issues or have questions, reach out on Discord or check the migration documentation for more details.